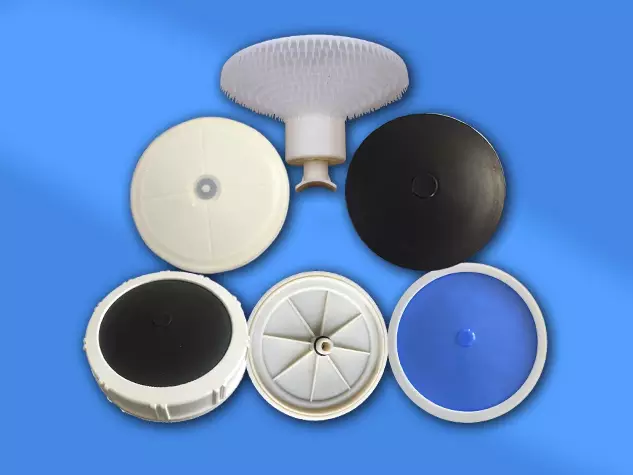
Microporous Aerator
Model: Customizable
Specifications: φ260mm, φ215mm
The diaphragm aerator head is a new type of aeration equipment. The aeration device consists of aerators, regulators, connectors, and air distribution pipes, tees, crosses, elbows, and other pipe fittings. It can meet the needs of most aeration tanks, contact oxygenation tanks for living organisms, and stabilization ponds for living organisms.The diaphragm aerator heads are arranged according to the tank shape and density. The aerators and air distribution pipes are connected using G3/4 threaded connections. The base uses internal threaded connections (fixed to the air distribution pipe), and the aerator uses external threaded connections. During installation, first fix the regulator to the tank bottom to the required size, and then use clamps to fix the air distribution pipe to the regulator. Its main features are small bubble diameter, uniform bubble size, and strong corrosion resistance.
Product Descriptions
Product Parameters
Aerator Dimensions: φ260mm, φ215mm
Service Area: 0.35-0.75m²/unit, 0.25-0.55m²/unit
Average Porosity of Aeration Membrane: 80-100 microns
Air Flow Rate: 1.5-3m³/unit/h
Total Oxygen Transfer Coefficient: kLa(20%) 0.204-0.337min⁻¹
Oxygen Utilization Rate: (Water Depth 3.2m) 18.4-27.7%
Oxygenation Capacity: 0.112-0.185KgO₂/m³h
Oxygenation Power Efficiency: 4.46-5.19KgO₂/kWh
Aeration Resistance: 180-280mmH₂O
Installation Procedure
- Review the installation drawings;
- Verify that the dimensions of the on-site water tank match the drawings;
- Lay out the lines according to the site conditions and drawings;
- Install expansion bolts and adjustable pipe supports according to the lines;
- Cut pipes according to the dimensions in the drawings;
- Position the central air inlet main pipe and attach the matching four-way or tee fittings (Note: Ensure they are horizontal and vertical);
- Lay out lines and drill holes on the branch pipes according to the aerator positions on the drawings. The hole size is generally 6-8mm, depending on the specific aerator model; (Make sure to clean up any debris after drilling; do not leave it in the pipes);
- Place the branch pipes on the adjustable pipe supports and attach them to the central air inlet main pipe (Note: The holes drilled on the branch pipes must be vertically upward);
- Attach the tee and elbow connections of the side pipes to the branch pipe openings. (Note: The pipes must be perfectly horizontal and vertical.)
- Adjust the overall level of the pipeline using the adjustable pipe bracket.
- Secure the adjustable pipe bracket with nylon cable ties (Method: Place the non-perforated side of the nylon cable tie into the bracket’s slot, then insert a 12mm thick iron rod into the square hole of the nylon cable tie and gently press to secure it).
- Attach the aerator nozzle to the drilled hole on the branch pipe (Note: The aerator nozzle must be vertically upward).
- After the aerator nozzle is securely attached (approximately 24 hours), install the aerator.
- After the aerator and pipeline are installed, to prevent air leakage at the pipe connections, fill the tank with clean water to approximately 100mm above the aerator. Then, test by aeration. If any leaks are found, mark them and repair them promptly. After passing inspection, the pipeline can be put into formal use.
- Precautions:
① To prevent damage to the aeration device from other operations, such as welding sparks and civil construction, the installation of the aeration piping system must be carried out after the civil construction is completed.
② ABS pipe ends can be glued without grinding, while UPVC pipe ends must be ground before gluing. ABS pipes are recommended for aeration piping.
Usage and Warranty
I. This product is only valid under the following conditions:
- Water temperature: 10~50℃
- Water quality: Regular domestic sewage
- Water depth: ≤5m
- Air volume: ≤3m³/h
II. The following conditions and environments are not covered by the warranty:
- Damage caused by improper handling during delivery or storage;
- Scratches to the rubber diaphragm during installation;
- Glue contamination of the rubber diaphragm;
- Damage to the rubber diaphragm from careless throwing;
- Operation in wastewater containing strong acids, strong alkalis, viscos substances, or large amounts of oil;
- Uneven aeration caused by unreasonable design layout, poor aeration air cleanliness, or debris left over from pipe installation is not covered by the warranty;
- Damage caused by improper use, maintenance, or storage, or damage caused by force majeure or unauthorized disassembly is not covered by the warranty.
Users should strictly follow the instructions for use of this aerator. Our company will not be responsible for warranty service beyond the scope of use.